Art Awareness Blog Post: Nancy Judd, Recycle Runway
Basic Facts:
Nancy Judd is an artist, environmental advocate, and teaching artist. For over twenty years she has been creating sculptures from discarded materials and using them to talk about how we live on the planet. Nancy installs her traveling solo exhibitions in high-traffic locations such as museums and airports.
Reactions:
Crime Scene- I loved the boldness of the piece and absolutely loved the different types of cation tapes and sizes. I feel kike it really encapsulated a bold and tight fit that reminds me of caution tape. This inspires me to incorporate more boldness in my works and don't be afraid of materials.
Carton Couture- I loved how thoroughly the cartons are used to create an entire ensemble. The various uses that are speciifc to certain parts of the outfit really help it all come together. It looks very stylish and very cool. This inspires me to go beyond a single article of clothing, and to really use all parts of my material in creative and innovative ways.
Crime Scene, 2011 Carton Couture, 2019


Old Blog


Process Post #3: Q2 Project
I decided to create a pair of modern pants and used the mask strap as a tool to hold two strips of masks in the front and back of each leg together. In combination with safety pins, I was able to bring and push together certain masks in the front and back to cover the upper thigh/waist area. Overall, the look was successful and I used clasps in the front and put the pant on the model with the wings. Now the two go together and work as an unusual material sculptural fashion piece!
Experience Post: Theodora Miller 12/10/2021
I really liked hearing about Mrs. Miller's art career, and really thought that her journey was quite extraordinary. I loved hearing about how Greece connected to her and her work, and definitely think that Greek culture and colors helped direct her pieces and helped her reach success. I thought that her traumatic accident and hardships faced due to that were unbelievable, but what was even crazier was her growth from the accident. How she used art as an outlet and truly let loose with it was inspiring to me. I also admired how she continues to do it on the side, and how she wasn't drawn to it immediately. It really showed me how the journey means so much to the artist and the work. I learned so much about how art should reflect me and what I should use art for. She was truly inspiring and I loved how she used art to find herself and was not all for the money and for the exhibitions.
Process Post #2: Q2 Project
Process Post #1: Q2 Project

I first took about 50 masks and removed the straps by simply ripping them off each mask. Then I began to sew them together with orange embroidery thread. I chose orange because it is the opposite color to blue and thus added emphasis on the connection between each mask to another. I created vertical strips by sewing 6 masks vertically together.


Sewing the masks together has proven to be way harder than I thought. It takes a lot longer because the masks are thicker and then the embroidery needle isn't particularly sharp. Anyway, I continued to sew strips and now have 7, but now I need to focus on what exactly I am going to make.
Process Post #3: Q1 At home Project Final


Process Post #2: Q1 At home Project
I have started pasting the strips onto fabric sleeves that I have attached to the top. I have decided to create wings since that is what the torn paper is looking like to me. I am starting with colored paper and as the wings go longer, they will increase into white school work and thin down to the ground.


Process Post #1: Q1 At Home Project
First I found and collected my past schoolwork and sorted them into white sheets and colored sheets. Then I set the colored papers to the side and cut and tore the white schoolwork to pieces. Then I took a piece of fabric (rectangular) and cut triangles out of each side to create ties in the back, a strapless crop top, and glued torn pieces of paper to it.


Process Post #4: Q1 Project (pictures)


Process Post #3: Q1 Project
I continued to reinforce and strengthen the dress by going in with tape and glue. I also decided that I will add a zipper in the back and keep the front folded over for a more complex composition.


Careers in Art Post
-
What is the title of the career/position? (Be specific! ie. there are MANY types of jobs within a museum. Don't just say "Work in a museum." There are curators, registrars, art handlers, conservators, marketing, and many more.)
-
The title of the career/position that I researched and looked into is dressmaker/seamstress.
-
-
Describe the responsibilities of the job and the required credentials to achieve the position.
-
The responsibilities of seamstresses are to alter, mend, modify and construct garments and other articles according to customers' specifications and needs. They may be self-employed or work in factories, dry cleaners, department stores, or boutiques. The required credentials to achieve this position are a high school diploma, as well as some vocational training in design, sewing, and measurements at a professional, school, and work experience would be beneficial and lead you to be more successful.
-
-
What college majors provide the training for this career?
-
The college majors that provide the training for this career are Fashion and sewing. Within the major, one should focus on attention to detail, creativity, manual dexterity, customer-service skills, ability to operate and use sewing equipment and tools.
-
-
What schools offer good programs in this area?
-
In this area, schools that offer good programs are Virginia Commonwealth University, Marymont University, and Howard University.
-
-
Are there any recognized top programs?
-
The top program recognized for this career is Fashion Institute of Technology (FIT) in New York
-


Process Post #2: School Project Q1
On Tuesday, I reinforced the top part of the dress and finished the front of it with the origami folds in the center. Then I began to really tape and pull together the paper to give it a definite shape and make it sturdier. On Thursday, I finished the skirt after redoing the second layer. The dress is much more sturdy now but I still need to figure out the skirt measurements and how to attach the top and bottom.
Process Post #1: In School Quarter Project
I began this project by folding papers into fans like I did when I was a child. Then, using staples and tape, I combined them in a way where they formed a skirt over the dress form I pinned them to. I switched my focus to the torso and chest of the figure, and after gaining some insight from my peers, decided to do an accordion fold with the paper for the torso, and then turned the fans upside down to cover the breasts. To fill in the center, I used an origami technique that create a cool 3D shape and looks. I need to support everything more and create a foundation for the piece to make it sturdy and wearable.

I feel that after this entire process I learned how to capture the figure and knew where to start my figure. I learned the importance of filling the space and going big as well as how to create different marks, and why soft marks are amazing for figure drawing. I feel that I need to work on the fluidity of my marks more and need to work on drawing with lighter marks. I learned a lot but still have a long way to go. I am still in the mindset of drawing what I think and not what I see and I need to get better and get past that habit.

Figure Drawing Reflection and Documentation:


Process Post #6: Abstract Painting


Process Post #5: Abstract Painting


Process Post #4: Abstract Painting


Process Post #2 and #3: Abstract Painting
.jpg)
.jpg)


.jpg)


Process Post #1: Abstract Painting
I did not have my big canvas today (it is at school), but I did start to think about what type of painting I want to create. After talking with Coach Hall about my small painting, he showed me the artist Joan Mitchell and I became very inspired by her work.
Thus, on my big painting, I want to emphasize rich colors, as many layers as I can paint, and movement and mixing of the paints. I want to take the darker colors in the background at first and build up to lighter ones to get a sense of value and almost a risen feeling. I am still sure exactly how I will lay it out but am excited to just get started and let my instincts and feelings guide the way. Here is a picture of the Joan Mitchell work that I really admired.

Q4 Experience Blog Post:
BALANCING ACT: THE PAINTINGS OF FANNY SANÍN
The artist I viewed an online art exhibition for was Colombian artist Fanny Sanín. She became a leader of the geometric abstraction movement and a key figure in modern Latin American art. Her art contains symmetrical design motifs that are characterized by blocky, simplified shapes consisting of two to five colors. These shapes vary in size and composition, however, each of Sanín’s paintings shares her unique aesthetic. Her cohesive geometric works elicit a sense of calm in their very structured construction.
After viewing her exhibition and learning about her and her art, I still would like to know how she came about creating this type of art and what her inspiration truly was. I believe her work was very influenced by post-war European creations of geometric abstraction. Because it was a style rooted in orderliness and stability, geometric abstraction offered Sanin and others an escape from their volatile surroundings. I also think that because of her bright colors and Latin American innovations, she was incredibly inspired by the works of Frida Khalo.
How did she feel about abstract art? Why did she feel the need to incorporate so much balance? Another source of influence may have been from her experience and stay in England. This opened her eyes to European works, and thus developed her style into one that was even more unique.
She is truly inspiring and was one of the first women to get truly involved in this field of art. She breathed new life into it and was able to create astounding pieces that show greater pictures and realities of her world and the Latin American world.
https://nmwa.org/whats-on/exhibitions/online/balancing-act-the-paintings-of-fanny-sanin/

_jfif.jpg)


Head and Hear Project Process Post #1
Here is my planning for my head and heart project. Step 1 is on the left and Step 2 is on the right!

Experience Post Week #26
Chéri Samba (Democratic Republic of Congo, born 1956): Samba was born in Kinto M'Vuila, Congo in 1956 as one of ten children to a blacksmith and farmer. He left home at 16 years old to become a sign painter in the country's capital. He opened his first studio in 1975. Samba uniquely picked up his comic-like combination with texts and images from his work as a sign painter, as well as an illustrator for a local magazine. Samba started working for a European market in 1978. Samba's work has been showcased in various exhibitions, museums, and places, including Les Magiciens de la Terre, the 2007 Venice Biennale, and the Museum of Modern Art in New York.


Samba's work, "In the Chair,"
is to the left. <<
"La Vraie Carte du Monde," is to the right. >>
These are both paintings, using acrylic paints (or paints similar to acrylics, I could not find an exact paint type.)
I absolutely love the colors and the contrast in the painting. The red, blue, and white in the center of the work really balances the whole piece. I felt as though the message of the piece was harder to read, but I can see how it is very symbolic and has various meanings and places in the world. I think the way he uses a lot of lines and contrast on the clothes of the man in the paiting is something that I will use and remeber so that my pieces are more honest and realistic. We are learning about Africa in my history classes, and I can't help but think that the background images have symbolic African meaning, and may be some sort of political message.
I was instantly drawn to this piece because of the colors and the message. I have no clue what this piece is trying to say and am very confused with the pink, red, yellow, green, and blue landscape-esk theme surrounding the central figure. I think that the main focus was supposed to be the figure, most likely someone very significant, maybe to African culture? But in my opinion, the landscape and colorful shapes and images surrounding him take away focus. I am curious to know what meaning this piece had, and how his life in the Congo affected this piece as well as all of his works. Life in Africa is vastly different from my own, and his pieces inspire me to learn more about life in Africa and our differences in how we see the world.
Experience Post Week #25

Why have I never heard of the wabi, sabi, and yugen before? How much of eastern Japanese art is actually used in America/the West? What is something the Japanese did better than the West? How does the Japanese view the aesthetic? Can anything be subjectively beautiful to everyone? Who/What decides if something is an aesthetic? What are the criteria for an aesthetic?
I felt like I learned a lot from Amanda Adams especially about the history of Japan and how its culture and art related to its past. I thought the Shinto aspect that is something that I have studied in my other classes was very interesting in her perspective and the fact that the Japanese aesthetic relates to Shintoism and Buddhism just makes sense but also makes me think that like the weather and nature, a Japanese aesthetic may be ever changing. Now, in my work, I will consider the aesthetic side of my pieces, and think about the balance and harmony I want the peace to bring. If the project calls for some sort of aesthetic, I will be sure to look at and consider the wabi, sabu, and yugen principles I learned about today and what they mean for art as a whole!

Process Post #6: Contemporary Performance Final


Process Post #5: Contemporary Performance
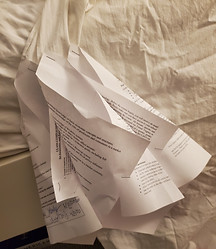
This week I took the outer layer of the piece and began to attach the papers starting from the bottom. I folded the papers and stapled a corner to the opposite side of the paper to give them a leaf-ish look, similar to that of which was used in my inspiration photos. I am still going back and forth on how to do the torso and shirt part, but I plan to finish this outfit this week and film it next week! I am a little bit behind schedule, but attaching the papers turned out to be way more work than I thought, and I actually have to use a mix of stapling and hot glue to get them to attach. Either way, I am excited to keep working and really love what I have created thus far. I also have taken all of the old papers I have out of binders, folders, and dividers and now they are ver accessible!
This week, as you can see, I made a top garment with a train in the back. My plan is to wear the first piece underneath this one and then staple paper to this garment directly. This garment is looser and thus easier to get on and off so that is why I am doing this. I have planned out how and where I want to put certain paper pieces and hopefully will finish attaching the paper by the end of the weekend. Today, I also visited MLWGS and planned out where I want to film my performance piece next Friday. I am very excited about this project but all of the paper that I am using is a bit concerning and is really opening my eyes to how much we waste in everyday life.


Process Post #2: Contemporary Performance
On Friday, I cleaned my room and made a space where I could put my materials and work on my project. This is pictured in the photo in the top left. Then, I made a daring trip to my attic and brought down a very, very heavy bin and almost fell down the stairs. The bin had all of my middle school papers, binders, notebooks, and more! I then found some more old school resources in my room and house and collected them, and this is pictured in the bottom left. After this, I started looking for inspiration on how to make my main portion of my performance: my outfit. To the right, there are numerous photos of dresses made from newspapers that really inspired my and now I am ready to start actually constructing my piece!
Process Post #3: Contemporary Performance
Today and Monday's studio day was mainly based on assembling the beginnings of my outfit/dress. Basically, I wrapped, marked, and cut fabric out and began to sew it together for the top half of the garment. The fabric will mostly only be needed on the top half and a few inches below the waist so that when I fold and attach the paper, it is not incredibly uncomfortable to wear. Since the fabric goes underneath, it does not need to be perfectly made, but still should uphold the paper and stay on my body. My plan for the skirt portion of the dress is to fold and sew/staple paper together, but mostly let it flow freely and have it be shorter in the front, and then long and dragging on the ground in the back.
.jpg)

.jpg)

Process Post #4: Contemporary Performance
Process Post #1: Contemporary Approaches to Sculpture

Here is a rough sketch of what my plan for my contemporary piece will be. Ever since 6th grade, u have collected, held onto, and stored every sheet of paper, flashcard, folder, etc. and now I have an abundance of it. Normally, I would just throw it all away or recycle it, but then this project came along and I thought it'd be cool if I used it. After talking with Coach Hall, we decided I should be moving the paper from one stack and either adding it to my dress which will be made of paper or moving it to another stack. Either way, I will have an outfit made out of paper, and everything around me will also be made out of old, used, written on sheets of paper. This, I feel, says a lot of intellectualism and universal learning, which is why I want to bring to light the pressures or school and work kids are put under nowadays due to society's standards. School is a very hard and stressful thing, but the intelligence one can gain from it can not be overlooked; just understood and exemplified.
Final Reflection of Clay Sculpture
Now, this was one heck of a project all right! It had many hardships and a lot of minor breakdowns, but I made it. I learned a lot from this project and am overall pretty happy with how my sculpture came out. If I am being honest, I was very pessimistic going into this project because clay really isn't my thing, but after, I am grateful we did this and I feel like I know and can use clay much more comfortably now. I struggled with the eyes the most because I feel like the eyes are such a big part of who someone is, and so I really wanted to get them right. The easiest part for me was the nose, and I honestly feel like the clay was really working with me and I was able to create this feature very easily. I learned a lot about how to mold, smooth, and attach the clay to pieces such as these, and this was a really great opportunity to work with 3D sculptural art. I wish that I could have made some facial aspects of my sculpture more smooth and realistic, but I know that I am no expert when it comes to clay, so I gave it my best shot! Moreover, this was a fun and slightly stressful project for me, but I learned a lot and now have a very cool head in my home!


.jpg)
.jpg)
.jpg)
I finally did it! I successfully added my eyes, eyelids, and pupils with somewhat success. After completing the eyes, I moved on to do the eyebrows and fix the nose and mouth a little bit more. After smoothing all of this out, I began to add lines to my hair for texture, but, if I am being honest, I did not really like the way my hair turned out. Then, I photographed this piece and discussed it with a few peers and now know what changes I want to make!
Process Post #4 and Pre-Final Clay Sculpture


Now that I had added the hair, I decided to once again focus on the facial features, and this time I paid special attention to my side profile. This also meant I worked more on my bone structure and especially my cheeks. After more failed attempts to do the eyes, I gave up on them for now, and instead, I fixed my lips as best I could, and then smoothed out my face. I also smoothed out my hair and tried to bring it all together. After today, I just need to do my eyes, eyebrows, hair detailing, and smooth out some areas.
Process Post #3 Clay Sculpture


After failing and attempted to do the eyes and mouth, I decided to give the mouth my best shot and then do the eyes later. I worked more on the shape of my nose, as well as my neck, and put some defining necklines for the throat in. Then, as I was too scared to do the eyes, I tried to firm up my bone structure and jawline but had some troubles there. Thus, I decided to add my hair and just try and get clay on the piece and form the overall shape of the hair. I am very unsure about how to go about doing the hair, but I will work more on it next time.
Process Post #2 Clay Sculpture
Process Post #1 Clay Sculpture
Today I wrapped my armature and stuck a cup on it to support my head. If I am being perfectly honest, I am very scared of this project. Clay has never been my thing, and created a self-portrait in clay just seems so wild. Anyway, after wrapping the armature, I began to put massive amounts of clay onto the newspaper-ed area and began to form a head, face, and neck shape. Once I got a feel for the face, I formed a little nose and put some indents in for the eyes. Then I attempted to do my lips, but I know I will have to fix them later.


Reflection on Artistic Growth
Looking back at your art skill inventory self-portrait and your most recent self-portrait, ON YOUR BLOG, write a post reflecting your artistic growth in terms of proportion, composition, expressiveness, and advanced mark-making:
As I look back at my art skill inventories, especially the figure drawing and the self-portrait ones, I know that I have learned so much and taken away a lot of new techniques and abilities through this project. First of all, my self-portrait was not well done in terms of proportion, and after completing these projects, especially with the help of gridding, I feel like I have a much better grasp on this concept. My compositions used to be very dull and forward-facing, but after completing the self-portrait, where we used different angles and poses, I feel like I know a lot more about how and why composition is useful and important. Expressiveness was something that I did not really think of, and it was something I definitely did not emphasize in my work, but after this project, I will never forget the importance and meaning that expression brings to a work of art. My mark-making before was plain and not very good, but after getting the chance to study Rapheal and reflect on his mark-making and take something away from him, I feel much more comfortable with it. I am not a professional or master like Raphael is with the mark, but I do now know a thing or two more about how to incorporate marks into your drawings to make them more interesting, stunning, and unique.
Self-Portrait Drawing: Process Posts 3 & 4


Self-Portrait Drawing: Process Post #2

I have officially graphed and outlined my self-portrait. I attempted and failed to draw the facial features and that will definitely be one of the final aspects of my drawing. I am starting with the hair and plan to start low and work my way up, and have outlines the shape and adding contour lines to those edges that I feel are set in stone. Overall, the piece is very close up, and that is something I must get over and work on creating something realistic, and not idealistic in my mind. I am very excited but also afraid because, once again, I want this to be really good, but am unsure of what direction to go in.

Process Post #1 Self-Portrait

As you can see, I have gathered many portraits and am playing around with the angles and positioning. I am unsure of which I like the best, so am asking the teacher for assistance, and then will go from there. I am also working on incorporating more aspects of my identity.


.jpg)
Process Post #4 Final Master Copy
The overall body and legs of figure are one that I really love and like how it turned out. I rushed the face and hair, and the face especially is not proportioned correctly and is one that I can go back and fix easily. The overall project was fun and a great learned experience. I enjoyed learning about the artists Raphael, looking at his works, and learning about his mark and how he creates his gorgeous pieces. While I am no renaissance artist, I felt like I learned and took a lot away from this project and am excited about the self-portrait section.

.jpg)
Process Post #3
I have started to lay down the baselines, and have gone into using Conte. I still need to work on the details in the hands, face, and clothes, but think I am just going to go straight to Conte to do so because it is pretty simple and something I can accomplish easily with the Conte. I am still working on mastering Raphael's mark, but am getting closer every day. I think that my main issue is my hesitation, and I just need to dive in and go for it. I am really excited to add to and finish this project and hope that it turns out well. As I am doing this, I am now appreciating renaissance art more and am even more impressed by early artists because of the true skill and creativeness it must have taken them to create pieces like this one.
Process Post #2: Verbal/ Written Thoughts
Today I touched up the pencil lines and marks, as well as practiced the artist's mark more in my sketchbook. I then started to lay out some base contour lines and it starting to take form! It took a bit to get the lines exactly where I wanted and a lot of fine-tuning was involved. I am still very hesitant to get started and to dive into the actual laying down of lines with the Conte. I am unsure if the grasp I have on the artist's mark is sufficient enough and really want this to look good! I also need to talk to Coach Hall about proportion and what he wants our focus to be, and thus be able to dive into the project with a focus on what I need to learn and takeaway from.
Process Post: Master Drawing #1


This Friday, after spending this week in my sketchbook working on mastering my artist's mark, I went back to my master drawing and continued to sketch out my figure lightly. I am ready to go in and start using the Conte crayon but am unsure of where to start. Also, I am having difficultly with the face, right-sides hand, and the bottom left foot. I can't quite get the right proportions, and the detailing is a little off. The face especially is very hard, but I am planning on doing this aspect last. I am planning on starting in the torso/thigh area, and working from there. This project is taking longer than expected, and even while gridding, I had trouble finding a material that was similar to that of a yardstick or large ruler. Eventually, I found a piece of an old painting easel and was able to use that piece to draw my lines. I am hesitant because I don't want to mess this up, but I do like doing something big like this and am overall really excited! As I said before, I spent more time in my sketchbook this week, and therefore haven't begun to put Conte crayon on the actual drawing, but this weekend I am planning on doing so! Hopefully, after this weekend I will have the mark mastered and be able to go fully into my master drawing.